How to Dehydrate Chicken for Dog Treats (Thin vs Thick, 2 vs 4 Hours)
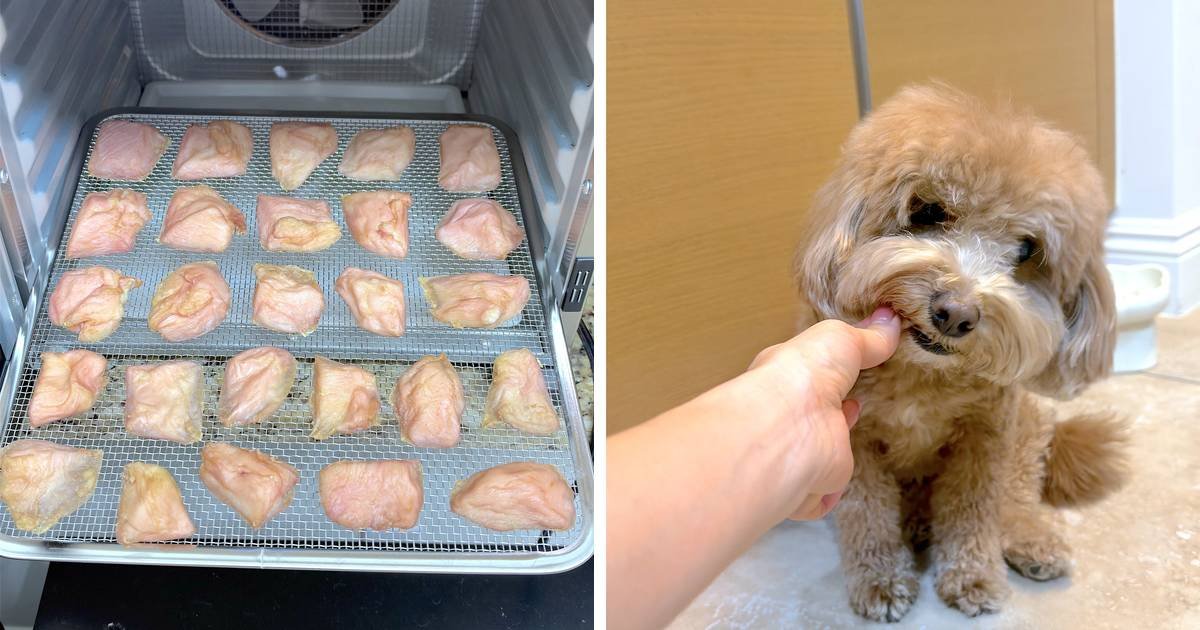
This is exactly how I dehydrate chicken for dog treats in my Cosori, with two thicknesses side by side. I cut organic chicken breast into thin slices and thick chunks and dried them together at 158°F. The thin slices were done in 2 hours. The thick chunks took 4. That’s only the first half of my timeline, though, and the step I added after it is the part I’d tell a friend about first.
I didn’t start this because there’s a shortage of chicken treats. There are already so many chicken jerky and chicken breast treats out there, and my dogs have had plenty of them. I started because I wanted to make theirs myself, from organic chicken with no preservatives, and that’s the reason I bought a food dehydrator in the first place.
Below you’ll find my real clock-time timeline, the thermometer readings (165.9°F and 167.1°F), photos of what done looks like, how my three small dogs reacted, and how I store the finished treats.
Quick Look: My Chicken Treat Batch
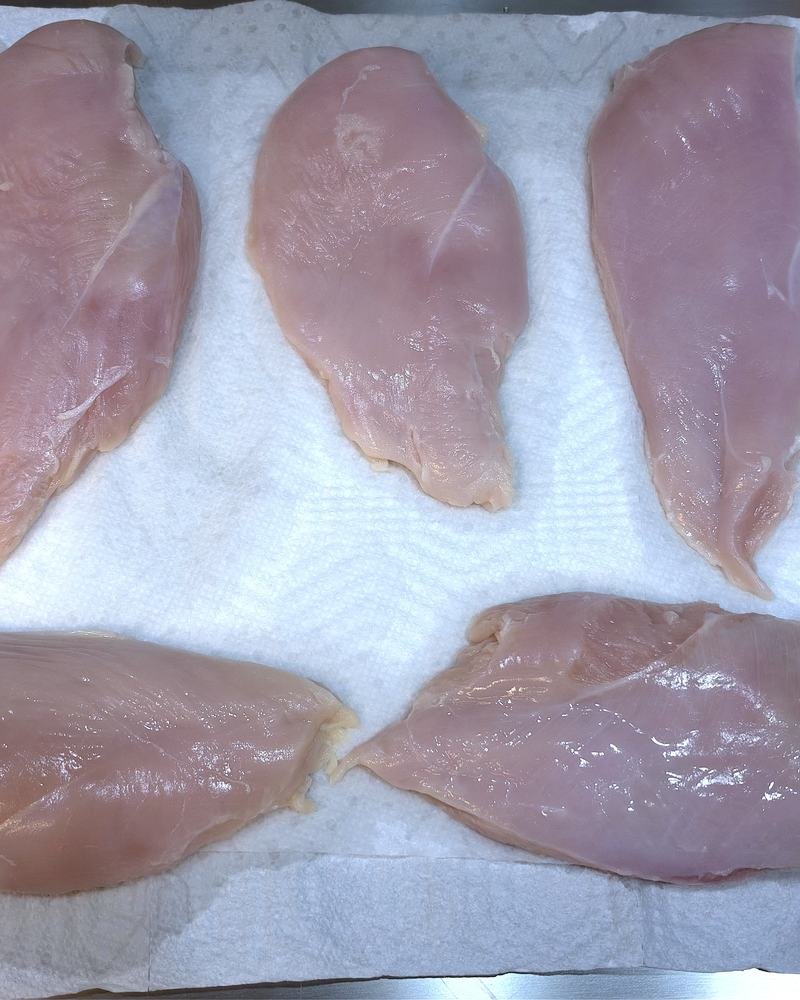
| What I used | 5 organic boneless, skinless chicken breasts from Costco, about a pack and a half. Nothing else, no preservatives. |
| Dehydrator | Cosori 6-tray stainless steel (I bought it on Amazon), set to 158°F |
| How I cut it | Eyeballed, not measured: thin slices about a quarter inch or a little under, thick chunks up to about 3/4 inch at the thickest |
| First dry | Thin slices 2 hours, thick chunks 4 hours |
| Heat check | 20 minutes at a rolling boil, then a thermometer in the center: 165.9°F (thin), 167.1°F (thick) |
| Final dry | 2 more hours at 158°F |
| Total time | About 4 hours 20 minutes (thin) and 6 hours 20 minutes (thick) |
| What it cost | About $15 of organic chicken (half of a roughly $30 Costco package) |
| Texture | Crispy outside, tender inside |
| Storage | Zip bag in the fridge |
| Best for / Good to know | Best for small or senior dogs who do better with a softer chew. Good to know: because the middle stays tender, these live in the fridge, not the pantry. |
Why I Started Making My Own Chicken Treats
We’ve bought a lot of store-bought chicken treats over the years, and my dogs liked them. But the more I cooked their meals at home, the more I wanted their treats to match. All three eat our homemade food mixed with a low-fat prescription kibble (here’s how we do our 70/30 bowl of homemade food and kibble), so I already think about every ingredient that goes in their bowls. I wanted to know exactly what was in their treats too.
So I went with the simplest version I could think of: organic chicken breast from Costco, no salt, no seasoning, and no preservatives, dried in my own kitchen. I ordered a Cosori 6-tray food dehydrator on Amazon for exactly this, and chicken breast was the first thing I made in it.
There was one more reason to test two thicknesses. Our oldest girl is a 14-year-old Pomeranian, about 12 pounds, and she doesn’t have many teeth left, so hard chews are out for her. The two younger boys are 3 and weigh about 10 and 8.6 pounds. A thin, chip-like slice and a tender chunk feel very different in a mouth with only a few teeth. If you have a senior dog too, here’s what our 14-year-old eats every day.
What You Need
- Boneless, skinless chicken breasts (I used 5 organic breasts from Costco)
- A food dehydrator (mine is a Cosori 6-tray stainless steel model from Amazon that goes up to 165°F)
- A sharp knife and a cutting board
- Paper towels
- A pot of boiling water and tongs
- An instant-read thermometer
- A zip-top bag
How I Dehydrate Chicken for Dog Treats, Step by Step
Step 1: Pat the chicken dry
I laid the breasts on paper towels and pressed another layer on top to soak up the surface moisture. Less water on the outside means less work for the dehydrator, and the pieces don’t sit there steaming at the start.
Step 2: Cut two ways, thin and thick
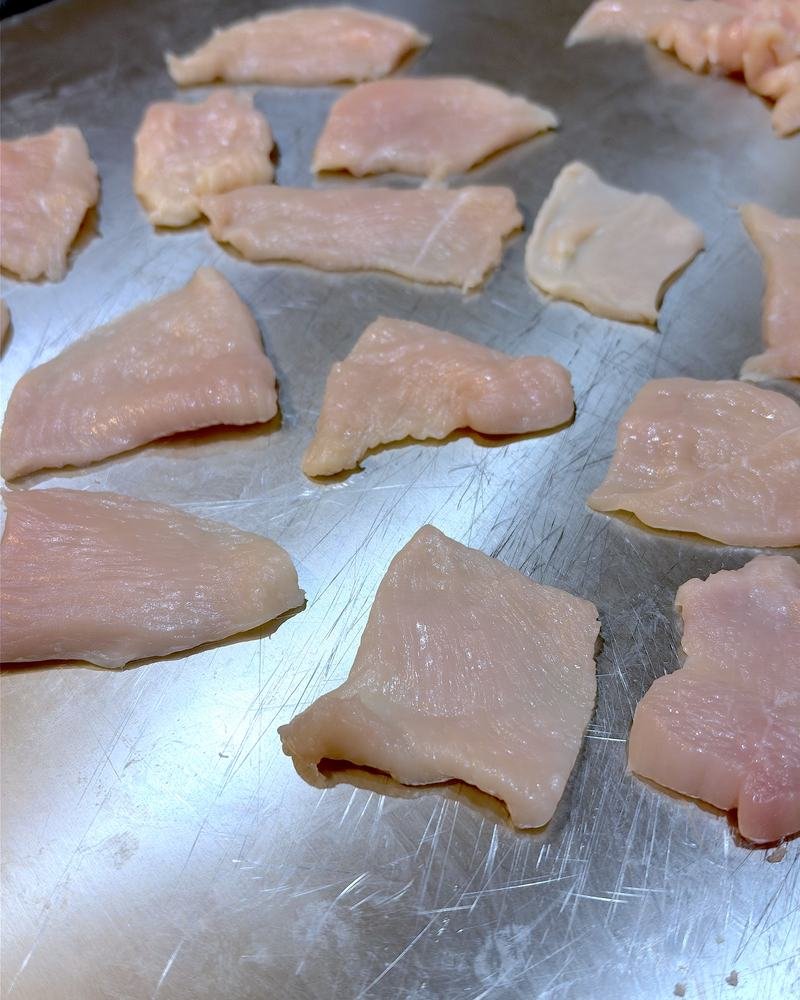
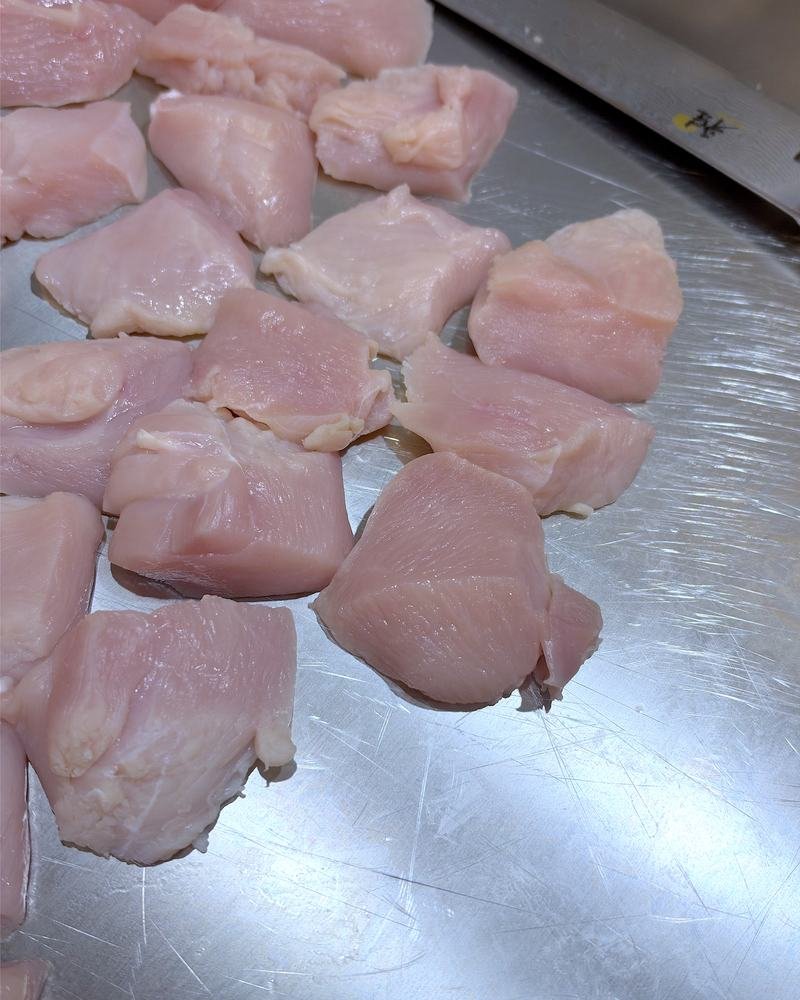
I split the batch in two. Half went into thin, flat slices, about a quarter inch or a little under. The other half went into thick, nugget-size chunks, up to about 3/4 inch at the thickest. I didn’t measure with a ruler, I just eyeballed it. If you came here looking for dehydrated chicken strips for dogs, the thin slices are basically that, just a little wider.
Step 3: Lay them out in one layer
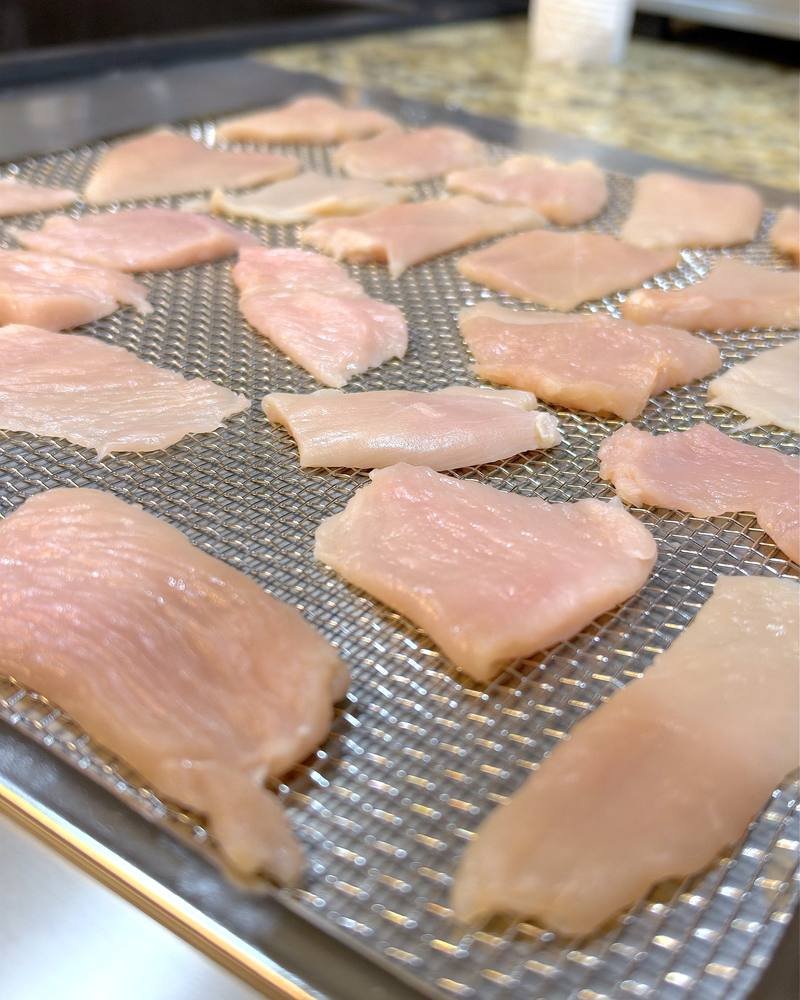
Single layer, with a little space around each piece so air can move. The thin slices went on the upper trays and the thick chunks on the bottom one. That worked out nicely, because the thin ones were the first to come out.

Step 4: Dry at 158°F
I set the Cosori to 158°F with a 2-hour timer at about 9:15 p.m., so this turned into a late-night project. My machine tops out at 165°F, so 158°F sits just under the max.

Step 5: Pull the thin slices at 2 hours, give the thick chunks 2 more
When the timer ended, the thin slices were done. The thick chunks were dry on the outside but still plump, so they went back in for another 2 hours, 4 hours total. (I show exactly what done looked like for each one further down.)


Step 6: Boil for 20 minutes and check the middle
This is the step I added. Each batch went into a pot of water at a full rolling boil for 20 minutes: the thin slices right after their 2 hours, and the thick chunks after their 4. Then I fished out a piece with tongs and pushed an instant-read thermometer into the center. The thin batch read 165.9°F. The thick batch read 167.1°F.
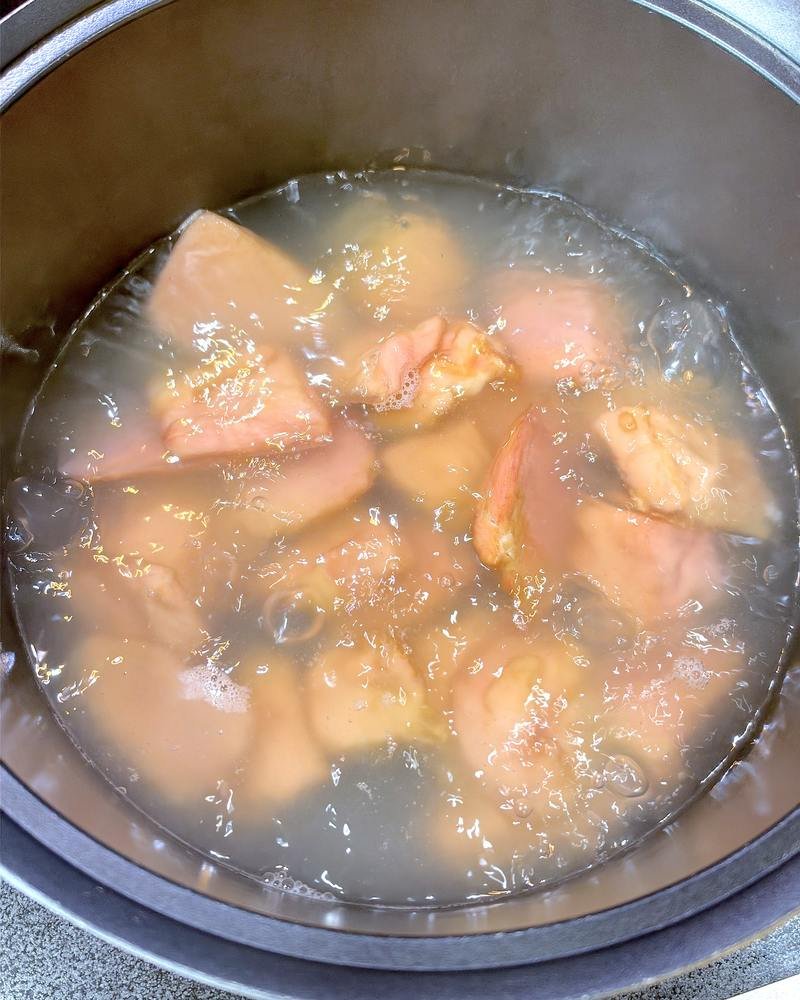
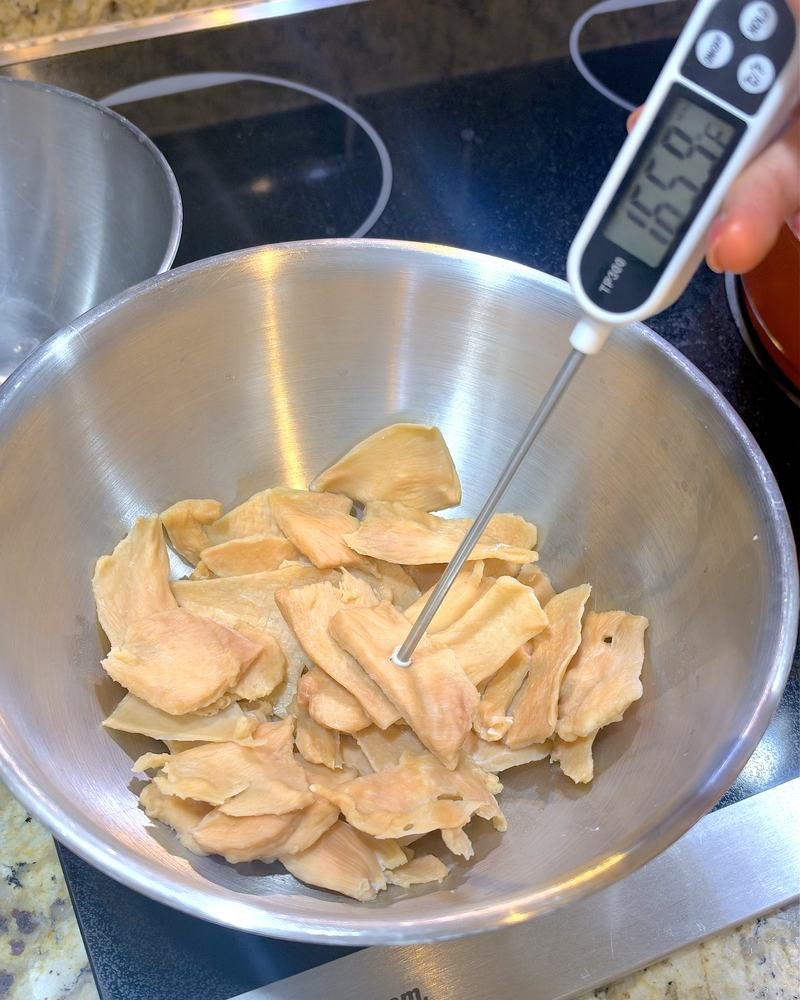

The boil changes the texture too. The outside keeps a little crispness and the inside turns soft and tender, so the pieces tear into small bits easily. That’s great for a dog with only a few teeth.
Step 7: Let the dogs taste, then dry again for 2 hours
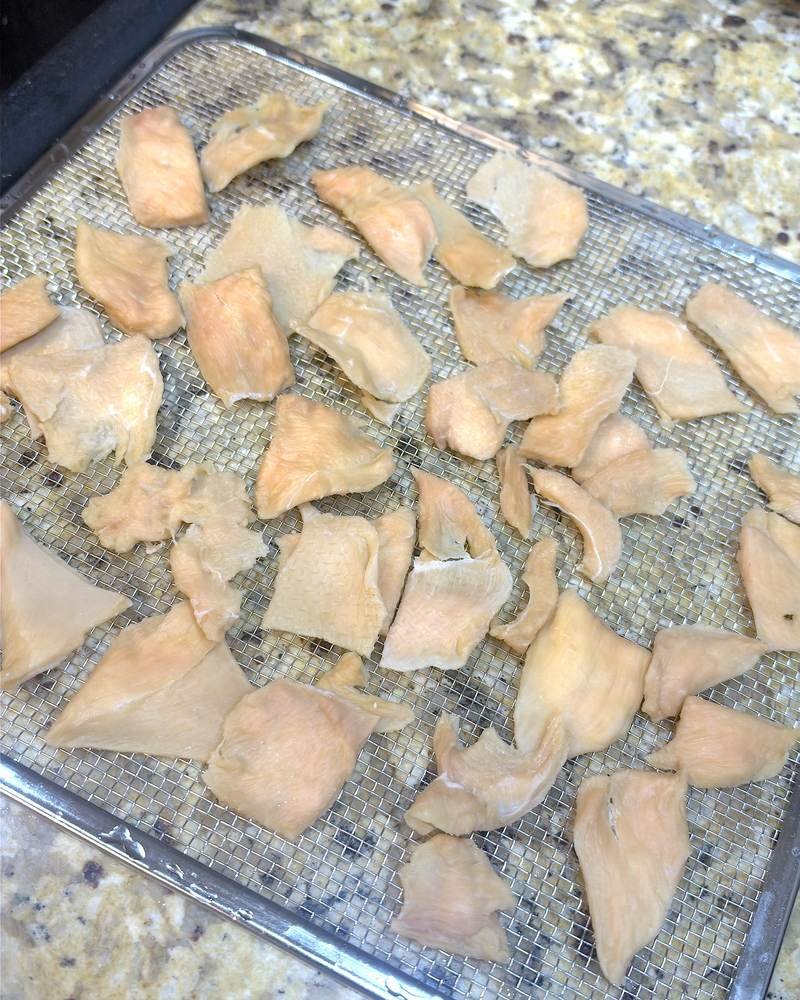
Each batch got a quick taste test right after its boil (more on that below). Then both went back on the dehydrator trays at 158°F for another 2 hours to firm up the outside again.
Step 8: Bag them and refrigerate
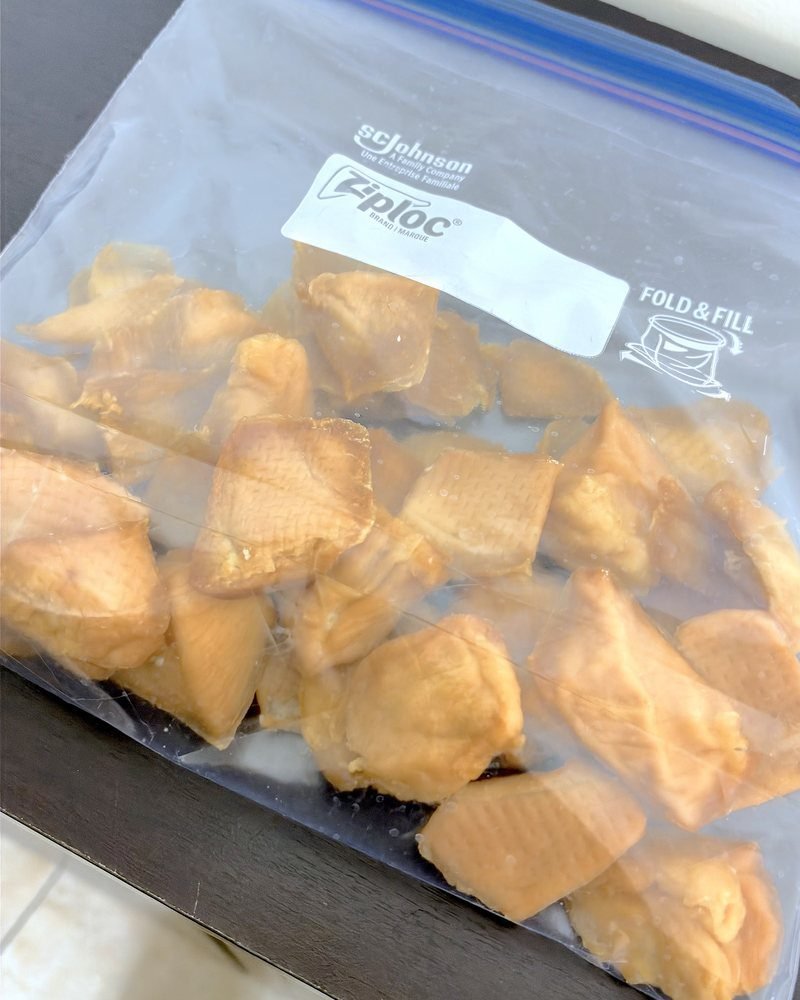
Once they cooled, I mixed the thin and thick pieces together in one zip bag and put it in the fridge.
How Long to Dehydrate Chicken for Dog Treats (My Real Timeline)
Here’s how the night actually went, straight from the timestamps on my photos.
| Clock time | What happened |
| About 8:40 p.m. | Patted the chicken dry and started cutting |
| About 9:15 p.m. | Both batches into the dehydrator at 158°F |
| About 11:20 p.m. | Timer done. Thin slices out, thick chunks back in for 2 more hours |
| About 11:40 p.m. | Thin slices into a rolling boil for 20 minutes |
| Just after midnight | Thermometer in a thin piece: 165.9°F |
| About 12:10 a.m. | Taste test, round one (thin slices) |
| About 1:25 a.m. | Thick chunks done after 4 hours |
| About 1:35 a.m. | Thick chunks into a rolling boil for 20 minutes |
| About 2:10 a.m. | Thermometer in a thick piece: 167.1°F |
| About 2:15 a.m. | Taste test, round two (thick chunks) |
| Last step | Both batches back in at 158°F for 2 hours, then into the fridge |
Add it up and the thin slices take about 4 hours 20 minutes of drying and boiling, and the thick chunks about 6 hours 20 minutes. If you start after dinner like I did, the thin batch fits in an evening, but the thick batch will keep you up.
If you’ve seen jerky recipes that run 10 to 12 hours, those dry raw strips until they’re completely dry and snap when you bend them. Mine is a softer treat with a tender middle, so the drying time is shorter and the treats stay in the fridge.
Thin Slices vs Thick Chunks: Which Should You Make?
| Thin slices | Thick chunks | |
| First dry at 158°F | 2 hours | 4 hours |
| After the first dry | Almost see-through and chip-like, with rack marks | Dry outside, plump middle |
| Center temp after a 20-minute boil | 165.9°F | 167.1°F |
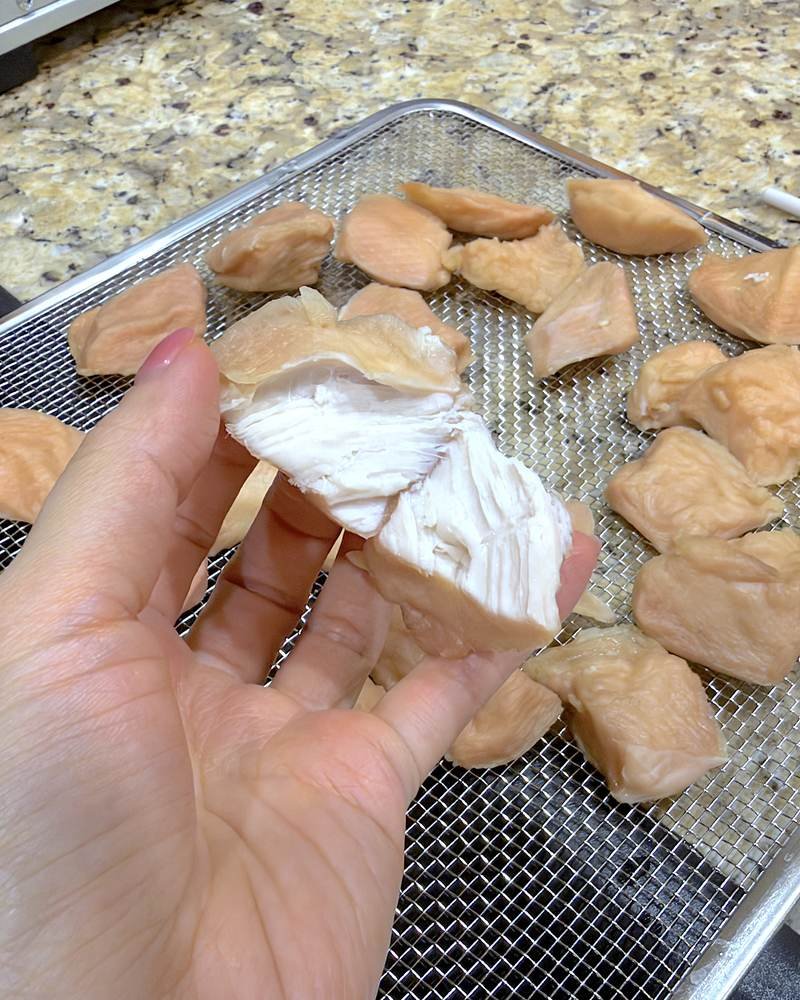
| After the boil | Soft, tears into strands | White and tender all the way through |
| How my dogs did | All three loved them, our oldest girl included | All three loved these too, our oldest girl included |
| Best for / Good to know | Best for a quick batch and for tearing into tiny pieces. Good to know: they shrink a lot, so cut them a bit bigger than you think. | Best for a chewier reward with a soft middle. Good to know: they take twice as long in the first dry. |
Honestly, my dogs don’t care which one. Chicken breast is one of their three favorite foods, right up there with sweet potato and eggs, and they went crazy for both. So choose by your schedule and your dog’s teeth, not by flavor.
How to Tell When They’re Done (With Photos)
Times change with thickness and with every machine, so here’s what I actually looked for at each stage.
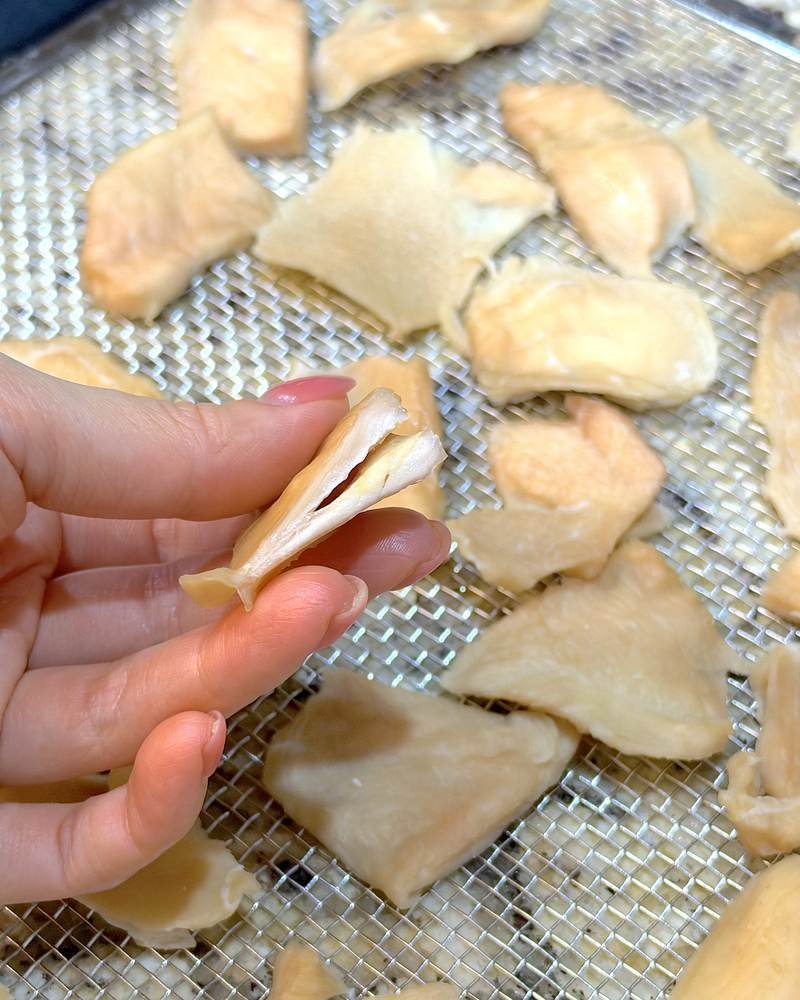
Thin slices after 2 hours: they shrank into thin, almost see-through sheets, and you could see the pattern of the rack pressed into them. That was my sign they were ready for the pot.

Thick chunks: at 2 hours the outside was dry but the middle was still soft and plump, so they went back in. At 4 hours they were dry all over the outside with a plump middle, and that’s when I pulled them for the boil.

After the boil: this is the check that matters. The thermometer goes into the thickest piece and should read 165°F or higher. Inside, the meat should be white and tender all the way through. Color alone isn’t a reliable test, which is why I use the thermometer every time.
Why I Boil After Drying (and the 165°F Check)
USDA’s jerky guidance says to heat poultry to 165°F before dehydrating, then dry it at a steady 130°F to 140°F. They also point out that once meat is dried, bacteria become more heat resistant.
My batch went in a different order, so I didn’t guess. I checked a thin piece and a thick piece after the boil, and they read 165.9°F and 167.1°F. Here are the two orders side by side.
| What I did | USDA’s order | |
| Step 1 | Dry raw chicken at 158°F (2 hours thin, 4 hours thick) | Heat the chicken to 165°F first (poach, steam, or roast) |
| Step 2 | Boil 20 minutes, then check the center with a thermometer | Dry at a steady 130°F to 140°F |
| Step 3 | Dry again at 158°F for 2 hours | Dry until done |
| Why | I wanted a crisp outside and a tender middle, and I checked the center myself | The standard food safety order for homemade jerky |
Good to know: if you’re making these for the first time, the USDA order is the simplest one to follow. Poach the chicken until the center reaches 165°F, then slice and dry it. Whichever order you choose, an instant-read thermometer takes the guessing out of it.
The Taste Test With My 3 Dogs
Round one happened just after midnight, right after the thin slices came out of the pot. All three lined up in the kitchen and waited for their turn.
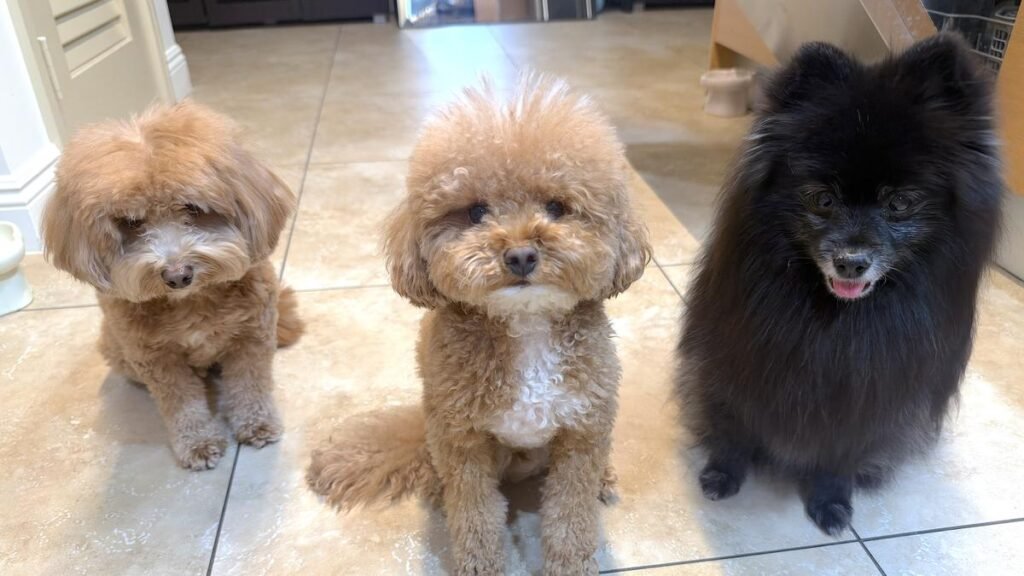
All three went a little crazy, which didn’t surprise me one bit. Chicken breast, sweet potato, and eggs are the three things they lose their minds over. The two younger boys took theirs straight from my hand.
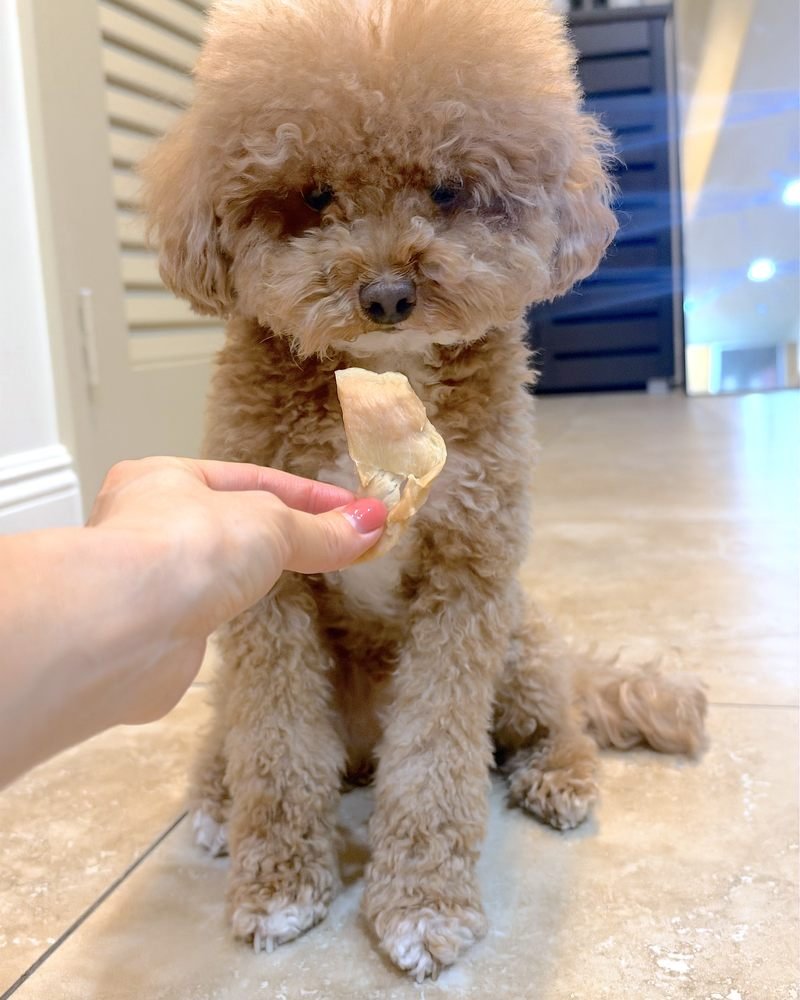
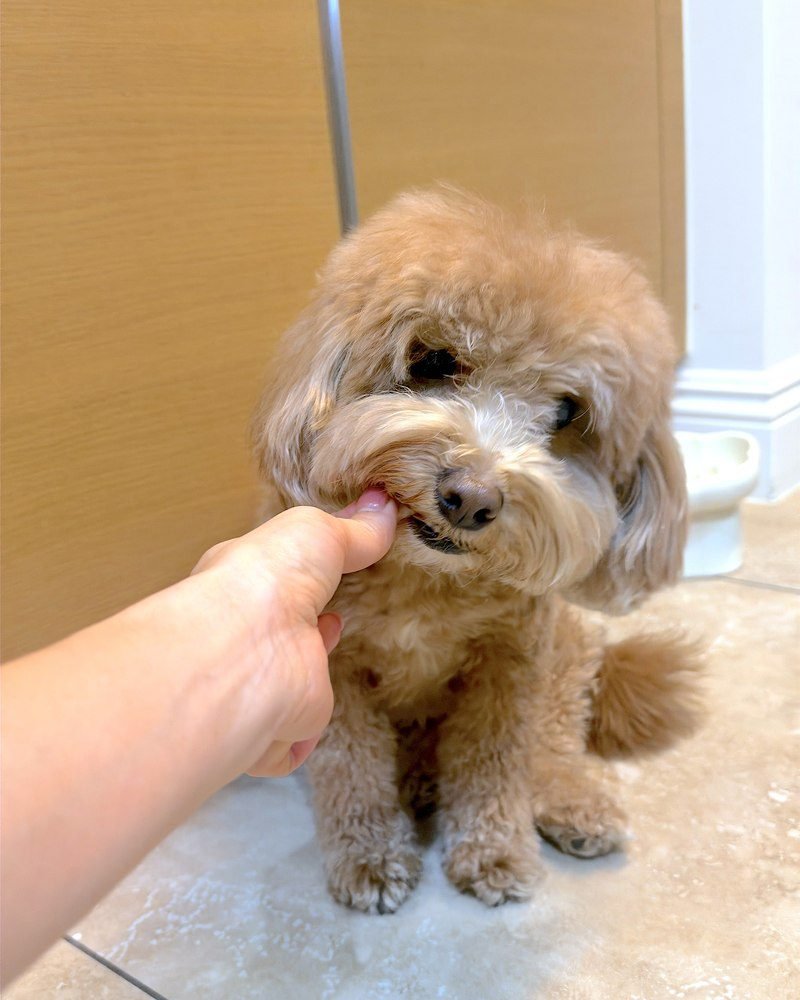
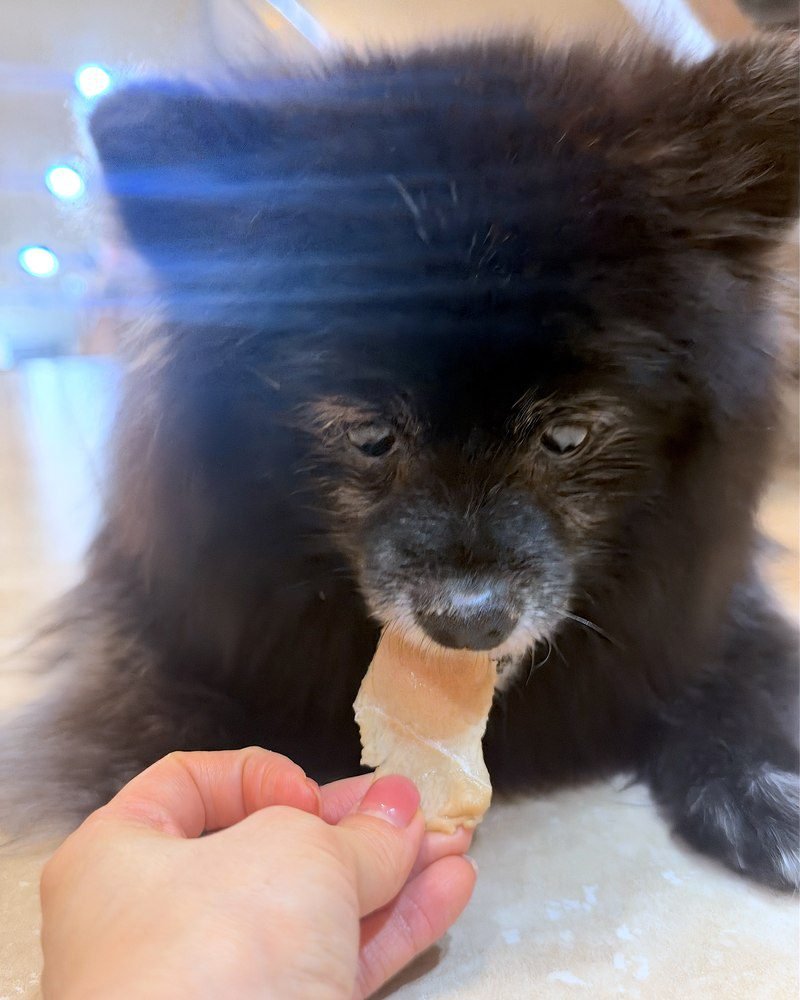
Our oldest girl had a thin piece. With so few teeth, she does best with pieces that are thin or soft, and the boiled chicken tears apart easily for her.
Round two was a little after 2 a.m., once the thick chunks had their boil and their thermometer check. I tore a few into small bits in my palm, and the two younger boys were right there with their noses in it.
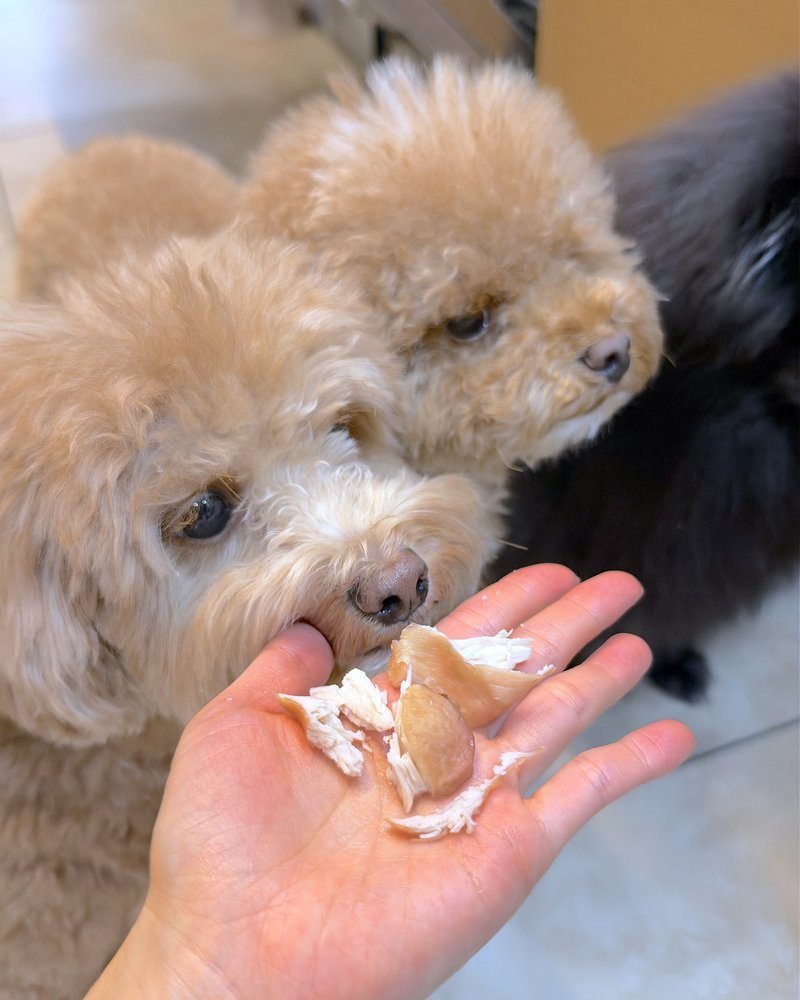
Nobody played favorites. Thin or thick, all three ate every piece, and yes, our oldest girl ate the thick ones too.
How Big I Make the Pieces
All three of my dogs are under 13 pounds, so I tear even the thick chunks into small bits instead of handing over a whole piece. The soft middle makes that easy, and it means one chunk can turn into a few rewards.
My husband keeps a close eye on their weight, so treats stay small and few here. A common rule of thumb is to keep treats to about 10% of a dog’s daily calories, and if your dog eats a prescription diet like ours, it’s worth checking with your vet before adding anything new.
What One Batch Cost Me (and Is It Worth It?)
The organic chicken breast I buy at Costco comes in a package with 3 packs inside, and mine was about $28, or around $30 with tax. This batch used about a pack and a half, so roughly $15 of chicken.
| Chicken | About $15 (5 organic breasts, about a pack and a half) |
| Other ingredients | None |
| Hands-on time | Patting, cutting, boiling, and bagging. Most of the rest is waiting. |
| How long it lasts us | About 10 days to 2 weeks |
I don’t hand these out often. Too many treats and the weight creeps up, and they get other treats too, like the beef liver treats we buy. That’s why one batch stretches so far for us.
Is it worth a late night? For me, yes. It’s organic, there’s nothing else in it, and I know exactly how every piece was made. That’s what I wanted when I bought the dehydrator, so the price feels fair to me.
How I Store Them
Mine go in a zip bag in the fridge. Because the middle stays tender after the boil, they’re closer to cooked chicken than to bone-dry jerky, and cooked chicken belongs in the fridge.
The general rule for cooked chicken is 3 to 4 days in the fridge. A batch lasts us longer than that, so the safer move is to keep a few days’ worth in the fridge and freeze the rest in small bags, then thaw what you need.
If you dry your pieces all the way, until they’re leathery and crack when you bend them, they keep longer. Extension guidance on homemade jerky lists about 2 weeks at room temperature in a sealed container for properly dried jerky. Mine aren’t that kind, so mine stay cold.
What to Know Before You Make Them
- Plain chicken only. No salt, garlic, onion, or seasoning.
- Trim the fat you can see. Fat doesn’t dry the same way the lean meat does.
- Cut a little bigger than you think you need. Everything shrinks in the dehydrator, the thin slices most of all.
- Plan your night. The thick batch kept me up past 2 a.m. Start earlier than I did, or make only thin slices on a weeknight.
- Special diet or health condition? Check with your vet before adding new treats.
- Raw chicken clean-up. Wash your hands, board, and knife well after cutting.
- Use a thermometer. It’s the easiest way to know the center reached 165°F.
- You don’t need a ruler. I eyeballed mine. Aim for about a quarter inch for thin slices and up to 3/4 inch for chunks.
Frequently Asked Questions
If you take one thing from this, make it the thermometer. Cut thin if you want a quick, chip-like treat and thick if you want a tender middle, but check that the center hits 165°F, and keep soft-centered treats in the fridge.
Next I’m drying sweet potato in the same dehydrator, since just saying the words “sweet potato” wakes my dogs up from a nap. Have you made chicken treats at home? Tell me your thickness and timing in the comments. And while you wait for that post, here’s how I cook plain sweet potato for my dogs.